Having grown up on Wallace and Gromit, Things That Go Bump in the Night, Moonwalker, and The Nightmare Before Christmas, stop motion animation is near and dear to me. I loved it so much as a kid that I developed a technique to make my own animations with my parents’ MiniDV camera by rapidly stopping and starting the record function. It worked well enough for my purposes, but I wouldn’t recommend it because there are now free tools that make the process much smoother.
While we now have the wonderful and professional-grade stop motion animation studio, Dragonframe, on Linux, not everyone can afford such niche software. So lets look at how we can roll out own. At the most basic level, we need some way of connecting a camera to our computer for remote shooting and a way to compile those images into a movie. Entangle and avconv are just the tools for the job. It’s not as sophisticated as say, Dragonframe, but it’s a pretty powerful combination once you get the hang of it.
Entangle uses the gPhoto library for remote shooting, so before we begin, make sure you have a gPhoto compatible camera. If your camera is not compatible with Entangle, don’t fret. You can still make animations by shooting blindly with you camera, copying the files to your computer, then compiling with avconv. The process isn’t as fancy, but that’s how this art form started, so you’d be animating just like the old pros!
Depending on your operating system, you can probably install Entangle from the software repository, however I would advise against that. Entangle is constantly being updated, and I found that the version in the software repository had major problems that had been addressed in the newest release. This means we are going to have to build from source. So head over to the Entangle website and download the latest version. Before we can install the program, we also need to make sure we have all of the build dependencies installed. As of this writing, you should be able to install everything on a Debian/Ubuntu system with the following command.
sudo apt-get install gcc intltool libglib2.0-dev libgdk-pixbuf2.0-dev libgphoto2-dev libgexiv2-dev libraw-dev libgudev-1.0-dev libpeas-dev liblcms2-dev libgtk-3-dev libgirepository1.0-dev libdbus-glib-1-dev libffi-dev gobject-introspectionNow execute the following commands to extract, build, and install the Entangle source code.
cd ~/Downloads
tar -zxvf entangle-*
cd entangle-*
./configure --prefix=/usr --sysconfdir=/etc --localstatedir=/var --libdir=/usr/lib
make
sudo make install
For other operating systems or if you encounter problems with the installation, check the Entangle FAQ.
Installing avconv is a piece of cake, by comparison. Just execute the following command.
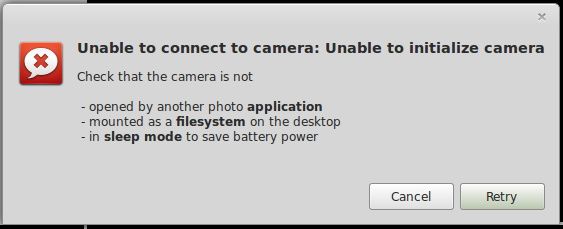
sudo apt-get install libav-tools libavcodec-extra-53Open Entangle and connect your camera to your computer. Right away Entangle will probably hit you with a couple of warnings about your camera. The first one asks if you want to unmount your camera because your operating system most likely already mounted it, preventing Entangle from accessing it.

The next one is a warning that thinks your camera is still in use. It’s not. Entangle just got ahead of itself.

Click the affirmative for both of these and you should be up and running. If you click the “continuous capture preview” button at the top of the program, you will see on screen a live preview of your camera feed. How useful! Now if you click the capture button directly next to it, your live preview will go away. Not useful! We can fix this. Navigate to the program preferences, then the capture tab, and check the “continue preview mode after capture” checkbox.

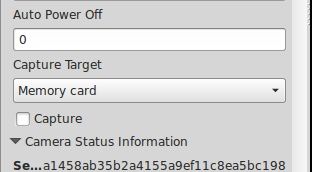
Now when you capture an image, the program will return to the live view. At least it should return to the live view. If you get an “unable to capture preview” error, you will need to change the capture target to “Memory card” instead of “Internal RAM”. This setting is found in the camera settings menu on the left hand side of the program. If you don’t see this menu, click the “view full list of camera settings” button at the top of the program.

Because it is critical that our lighting stay consistent from frame to frame, you should look through your available camera settings and manually set every setting (aperture, shutter speed, ISO). Also make sure any picture styles or in camera enhancements are turned off.
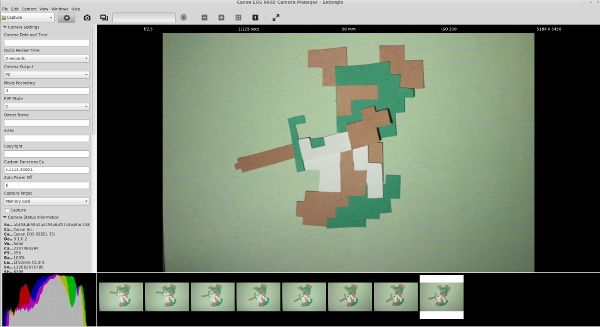
Finally, we can begin animating. I made a paper Link for my animation, but you could animate anything. A lump of clay, old toys, or some scraps of paper. The possibilities are endless!

Do you notice anything strange about my setup? It’s upside down! What’s that all about? I found it freed up a lot of space to work when my camera was positioned opposite me. This setup is ideal for shooting on a flat surface like a tabletop, and it’s trivial to rotate the video when we compile it.
Making small adjustments to your model, capture each frame of the video one after the other. Ideally you would be shooting your animations at 24 frames per second, because this is the standard for film, but I’ve found that stop motion still looks good at only 10 or 12 frames. Just keep in mind that your animation will look crisper and more fluid with higher frame rates. The trade off is that you will need to shoot many more frames. For slow movements, you will want to make tiny adjustments between frames. Quick movements would require bigger adjustments, of course. While you can shoot several of the same frame to create a pause, it looks much more natural if there is a bit of movement in the frame. Lightly touching the model in between every frame will bring a static shot to life.

If you make a mistake, like I just did, you can right click on the thumbnail and select delete. The only problem with this is that entangle won’t adjust the names of your other files to accommodate the missing frame. This will be a problem when we compile our video, but don’t worry about it for now. Continue on as though everything is perfectly okay.
When you are satisfied with your animation (or tired of working on it), you may move on to compiling your animation with avconv.